Abstract
One day, you might have a situation where you are required to make the shared users upload a file and text using a dialog or sidebar on Google Spreadsheet to your Google Drive and Spreadsheet without authorization by the users. This report introduces a solution for achieving this situation.
Introduction
Google Spreadsheet can run Javascript on a dialog and a sidebar. Ref These can be used as a strong tool for working on Spreadsheet. There might be a situation where you want to make the shared users input a value and upload a file without authorization of the scopes. In this report, I would like to introduce 2 patterns to achieve this goal.
Pattern 1
In this pattern, the file is uploaded with the Web Apps. The maximum file size is 50 MB because of the maximum size of the file blob of Google Apps Script.
In order to test this sample, please do the following flow.
1. Prepare Google Spreadsheet
Please create a new Google Spreadsheet and open the script editor.
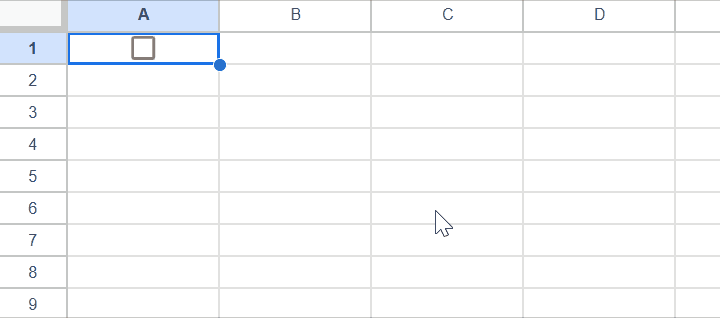
2. Insert a checkbox for executing a script
In order to execute the script, in this sample, a checkbox is used. So, please insert a checkbox to “A1” of “Sheet1”.
In this sample, when this checkbox is checked, the script is run by the installable OnEdit trigger. By this, the shared users are not required to authorize the scopes.
3. Deploy Web Apps
The detailed information can be seen in the official document.
Please set this using the script editor.
- On the script editor, at the top right of the script editor, please click “click Deploy” -> “New deployment”.
- Please click “Select type” -> “Web App”.
- Please input the information about the Web App in the fields under “Deployment configuration”.
- Please select “Me” for “Execute as”.
- Please select “Anyone” for “Who has access to the app:”.
- Please click “Deploy” button.
- When “The Web App requires you to authorize access to your data.” is shown, please click “Authorize access” button. And, please authorize the scopes.
- Copy the URL of the Web App. It’s like
https://script.google.com/macros/s/###/exec. This URL is used.
4. Sample script
Please copy and paste the following sample script and HTML to your script editor.
Code.gs
Please set your sheet name and the folder ID of the folder you want to put the file.
function doPost(e) {
  const sheetName = "Sheet1"; // Please set your sheet name.
  const folderId = "###"; // Please set your folder ID.

  const { text, file } = JSON.parse(e.postData.contents);
  const { filename, mimeType, bytes } = file[0].files[0];
  const f = DriveApp.getFolderById(folderId).createFile(
    Utilities.newBlob(bytes, mimeType, filename)
  );
  const sheet = SpreadsheetApp.getActiveSpreadsheet().getSheetByName(sheetName);
  sheet.appendRow([text[0].value, f.getUrl()]);
  return ContentService.createTextOutput("Done.");
}

function installedOnEdit(e) {
  const sheetName = "Sheet1"; // Please set your sheet name.

  const { range } = e;
  const sheet = range.getSheet();
  if (
    sheet.getSheetName() != sheetName ||
    !range.getA1Notation() == "A1" ||
    !range.isChecked()
  )
    return;
  SpreadsheetApp.getUi().showModalDialog(
    HtmlService.createHtmlOutputFromFile("index"),
    "sample"
  );
  range.uncheck();
}
index.html
Please set your Web Apps URL to const url = "https://script.google.com/macros/s/###/exec";.
<!DOCTYPE html>
<html>
  <head>
    <base target="_top" />
    <script src="https://cdn.jsdelivr.net/gh/tanaikech/HtmlFormObjectParserForGoogleAppsScript_js/htmlFormObjectParserForGoogleAppsScript_js.min.js"></script>
  </head>
  <body>
    <form>
      <input type="text" name="text" id="text" />
      <input type="file" name="file" id="file" />
      <input type="button" value="Submit" onclick="main(this.parentNode)" />
    </form>
    <div id="progress"></div>

    <script>
      async function main(e) {
        document.getElementById("progress").innerHTML = "Running...";
        const url = "https://script.google.com/macros/s/###/exec"; // Please set your Web Apps URL here.

        const obj = await ParseFormObjectForGAS(e, null, null, true);
        fetch(url, { method: "POST", body: JSON.stringify(obj) })
          .then((res) => res.text())
          .then((res) => {
            console.log(res);
            google.script.host.close();
          });
      }
    </script>
  </body>
</html>
5. Install OnEdit trigger
In order to execute the script when the checkbox of “A1” of “Sheet1”, please install the OnEdit trigger to the function installedOnEdit. Ref
6. Reflect the latest script for Web Apps
Your Web Apps URL was replaced with const url = "https://script.google.com/macros/s/###/exec";. So, in this case, it is required to reflect the latest script to Web Apps.
You can see the details of this in my report “Redeploying Web Apps without Changing URL of Web Apps for new IDE (Author: me)”.
When you modify the Google Apps Script of Web Apps, please modify the deployment as a new version. By this, the modified script is reflected in Web Apps. Please be careful about this.
7: Testing
The sample situation can be seen in the following demonstration.
When the above flow is done, you can test this script. In order to execute the script, please check the checkbox of “A1” of “Sheet1”. By this, a dialog is opened. When you input a sample text to the text input tag, select a file, and click a button, the text and the file are uploaded to the Google Apps Script side. And, the text and the file link of the uploaded file are put into “Sheet1”.
Pattern 2
In this pattern, the file is uploaded with the resumable upload through Drive API. The files more than 50 MB can be uploaded.
In order to test this sample, please do the following flow.
1. Prepare Google Spreadsheet
Please create a new Google Spreadsheet and open the script editor.
2. Insert a checkbox for executing a script
In order to execute the script, in this sample, a checkbox is used. So, please insert a checkbox to “A1” of “Sheet1”.
In this sample, when this checkbox is checked, the script is run by the installable OnEdit trigger. By this, the shared users are not required to authorize the scopes.
3. Create service account
In this sample, as a test, the values of private_key and client_email from a JSON file downloaded when the service account is created are used.
4. Share your folder with a service account
In order to upload a file to your Google Drive using the service account, please create a new folder for your Google Drive. And, please share the created folder with the email of the service account as the writer. By this, the file can be put into the folder on your Google Drive using the service account.
And, please copy the folder ID. This folder ID is used in the script.
5. Sample script
Please copy and paste the following sample script and HTML to your script editor.
Code.gs
Please set the following variables using your values.
private_key, client_email, folderId, and sheetName
// ref: https://gist.github.com/tanaikech/20ea127a8e23a7c609f8d764c8b7ed7c
function getAccessTokenFromServiceAccount_() {
  var private_key =
    "-----BEGIN PRIVATE KEY-----\n###\n-----END PRIVATE KEY-----\n"; // private_key of JSON file retrieved by creating Service Account
  var client_email = "###"; // client_email of JSON file retrieved by creating Service Account

  var scopes = ["https://www.googleapis.com/auth/drive"]; // Scopes
  var url = "https://www.googleapis.com/oauth2/v4/token";
  var header = {
    alg: "RS256",
    typ: "JWT",
  };
  var now = Math.floor(Date.now() / 1000);
  var claim = {
    iss: client_email,
    scope: scopes.join(" "),
    aud: url,
    exp: (now + 3600).toString(),
    iat: now.toString(),
  };
  var signature =
    Utilities.base64Encode(JSON.stringify(header)) +
    "." +
    Utilities.base64Encode(JSON.stringify(claim));
  var jwt =
    signature +
    "." +
    Utilities.base64Encode(
      Utilities.computeRsaSha256Signature(signature, private_key)
    );
  var params = {
    method: "post",
    payload: {
      assertion: jwt,
      grant_type: "urn:ietf:params:oauth:grant-type:jwt-bearer",
    },
  };
  var res = UrlFetchApp.fetch(url, params).getContentText();
  var obj = JSON.parse(res);
  return obj.access_token;
}

function installedOnEdit(e) {
  const folderId = "###"; // Please set your folder ID.
  const sheetName = "Sheet1"; // Please set your sheet name.

  const { range } = e;
  const sheet = range.getSheet();
  if (
    sheet.getSheetName() != sheetName ||
    !range.getA1Notation() == "A1" ||
    !range.isChecked()
  )
    return;
  const html = HtmlService.createTemplateFromFile("index");
  html.token = getAccessTokenFromServiceAccount_();
  html.spreadsheetId = SpreadsheetApp.getActiveSpreadsheet().getId();
  html.sheetName = sheetName;
  html.folderId = folderId;
  SpreadsheetApp.getUi().showModalDialog(html.evaluate(), "sample");
  range.uncheck();
}
index.html
<!DOCTYPE html>
<html>
  <head>
    <base target="_top" />
    <script src="https://cdn.jsdelivr.net/gh/tanaikech/ResumableUploadForGoogleDrive_js/resumableupload_js.min.js"></script>
  </head>
  <body>
    <form>
      <input type="text" name="text" id="text" />
      <input type="file" name="file" id="file" />
      <input type="button" value="Submit" onclick="main(this.parentNode)" />
    </form>
    <div id="progress"></div>

    <script>
      function main(obj) {
        const file = obj.file.files[0];
        if (file.name != "") {
          let fr = new FileReader();
          fr.fileName = file.name;
          fr.fileSize = file.size;
          fr.fileType = file.type;
          fr.readAsArrayBuffer(file);
          fr.onload = (e) => resumableUpload(e, obj.text.value);
        }
      }

      function resumableUpload(e, text) {
        document.getElementById("progress").innerHTML = "Initializing.";
        const f = e.target;
        const resource = {
          fileName: f.fileName,
          fileSize: f.fileSize,
          fileType: f.fileType,
          fileBuffer: f.result,
          accessToken: "<?!= token ?>",
          folderId: "<?!= folderId ?>",
        };
        const ru = new ResumableUploadToGoogleDrive();
        ru.Do(resource, function (res, err) {
          if (err) {
            console.log(err);
            return;
          }
          console.log(res);
          let msg = "";
          if (res.status == "Uploading") {
            msg =
              Math.round(
                (res.progressNumber.current / res.progressNumber.end) * 100
              ) + "%";
          } else {
            msg = res.status;
          }
          document.getElementById("progress").innerText = msg;
          if (res.result) {
            const fileUrl =
              "https://drive.google.com/file/d/" +
              res.result.id +
              "/view?usp=drivesdk";
            const url =
              "https://sheets.googleapis.com/v4/spreadsheets/<?!= spreadsheetId ?>/values/<?!= sheetName ?>:append?valueInputOption=USER_ENTERED";
            fetch(url, {
              method: "POST",
              headers: {
                authorization: "Bearer " + resource.accessToken,
                "Content-Type": "application/json",
              },
              body: JSON.stringify({ values: [[text, fileUrl]] }),
            })
              .then((response) => response.json())
              .then((data) => {
                console.log(data);
                google.script.host.close();
              })
              .catch((error) => console.error(error));
          }
        });
      }
    </script>
  </body>
</html>
6. Enable Drive API
In this sample, the file is uploaded with the resumable upload of Drive API. So, please enable Drive API at Advanced Google services. Ref
7. Install OnEdit trigger
In order to execute the script when the checkbox of “A1” of “Sheet1”, please install the OnEdit trigger to the function installedOnEdit. Ref
8: Testing
The sample situation can be seen in the following demonstration.
When the above flow is done, you can test this script. In order to execute the script, please check the checkbox of “A1” of “Sheet1”. By this, a dialog is opened. When you input a sample text to the text input tag, select a file, and click a button, the text and the file are uploaded to your Google Drive by Drive API with the resumable upload. And, the text and the file link of the uploaded file are put into “Sheet1”.