
Abstract
When PDF file can be managed with Google Apps Script, that will lead to the automation process on cloud. In this report, the method for cooking PDF over Google Apps Script.
Introduction
Google Apps Script is one of the strong tools for achieving the automation process. When Google Apps Script can be used for the situation, it can be processed with cloud computing. By this, the users are not required to stay on the desks with the PC. One day, there might be a case where you are required to manage PDF files using Google Apps Script. When PDF files can be managed with Google Apps Script, that will be very important for achieving the automation process. Unfortunately, there are no built-in methods for directly managing PDF data using Google Apps Script. Fortunately, after the V8 runtime has been released, several raw Javascript libraries could be used with Google Apps Script. pdf-lib is also one of them. When this is used, PDF data can be cooked over Google Apps Script. In this report, I would like to introduce achieving this using a Google Apps Script library.
Install Google Apps Script library: PDFApp
All sample scripts in this report use PDFApp of a Google Apps Script library.
In order to efficiently manage PDFs, I created a Google Apps Script library (PDFApp). In this post, this library is used. So, please install this library.
You can see how to install it here. And also, you can see detailed information about the specification of this library there.
The project key for installing the library is 1Xmtr5XXEakVql7N6FqwdCNdpdijsJOxgqH173JSB0UOwdb0GJYJbnJLk.
Original posts
I have already published several posts as shown in “Refference” section. I created this library to more efficiently manage PDFs with a simple script by summarising the scripts of these posts.
Cooking
The following scripts suppose that you have already installed a Google Apps Script library of PDFApp. Please be careful about this.
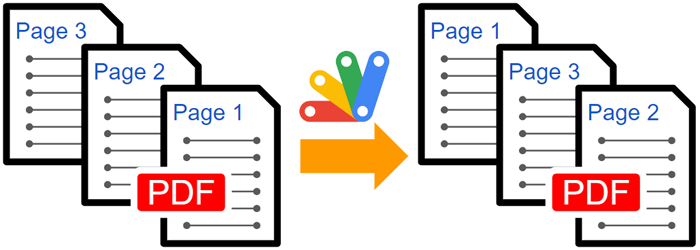
Export pages from a PDF

const blob = DriveApp.getFileById("###fileId of PDF file###").getBlob();
const pageNumbers = [2, 4, 6, 8];

PDFApp.setPDFBlob(blob)
  .exportPages(pageNumbers)
  .then((blob) => DriveApp.createFile(blob))
  .catch((err) => console.log(err));
- In this sample, 2, 4, 6, 8, pages are exported. And, a new PDF file is created to the root folder.
Get metadata of a PDF
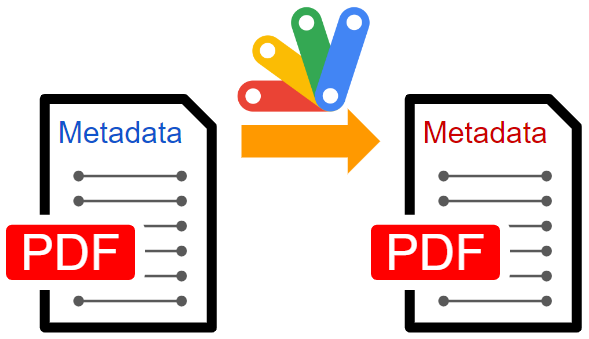
const blob = DriveApp.getFileById("###fileId of PDF file###").getBlob();

PDFApp.setPDFBlob(blob)
  .getMetadata()
  .then((res) => console.log(res))
  .catch((err) => console.log(err));
-
When this script is run, the metadata is retrieved from the inputted PDF blob.
-
When I tested this script, I noticed that the values of
modificationDateandproducermight be a bug in pdf-lib.modificationDatereturns the execution time.produceralways returns pdf-lib (https://github.com/Hopding/pdf-lib). I guessed that this might be a bug in pdf-lib. And, I would like to believe that this will be resolved in the future update.
Update metadata of a PDF
const blob = DriveApp.getFileById("###fileId of PDF file###").getBlob();

const object = {
  title: ["sample title", { showInWindowTitleBar: true }], // This property is an array.
  subject: "sample subject",
  author: "sample author",
  creator: "sample creator",
  creationDate: new Date("2023-08-01T00:00:00"), // This value is date object.
  modificationDate: new Date("2023-08-01T10:00:00"), // This value is date object.
  keywords: ["sample keyword 1", "sample keyword 2", "sample keyword 3"], // This property is an array.
  producer: "sample producer",
};

PDFApp.setPDFBlob(blob)
  .udpateMetadata(object)
  .then((newBlob) => DriveApp.createFile(newBlob))
  .catch((err) => console.log(err));
-
When this script is run, the metadata of “title”, “subject”, “author”, “creator”, “creationDate”, “modificationDate”, “keywords”, and “producer” is updated. And, after the update is finished, a new PDF file is created in the root folder.
-
The detailed information of each property in the object can be seen at https://pdf-lib.js.org/docs/api/classes/pdfdocument.
Reorder pages of a PDF
const blob = DriveApp.getFileById("###fileId of PDF file###").getBlob();

const newOrderOfpages = [3, 1, 2, 5, 4]; // Please set new order of the pages in a PDF file. In this sample, the order of pages of the original PDF file is changed to 3, 1, 2, 5, 4.

const ignoreSkippedPages = true; // If this is false, when the PDF has 5 pages and "newOrderOfpages" is "[3, 2]", the exported PDF file has 5 pages of 3, 2, 1, 4, 5. If this is true, when the PDF has 5 pages and "newOrderOfpages" is "[3, 2]", the exported PDF file has only 2 pages of 3 and 2.

PDFApp.setPDFBlob(blob)
  .reorderPages({ newOrderOfpages, ignoreSkippedPages })
  .then((newBlob) => DriveApp.createFile(newBlob))
  .catch((err) => console.log(err));
-
When this script is run, a new PDF file is created with the new order of pages.
-
When the order of pages is changed, I thought that for example, when a PDF file has 5 pages and you want to replace only the 1st page and the 2nd page, the actual exported pages are 2, 1, 3, 4, 5. But, in this script, when
ignoreSkippedPagesis used as false, this can be achieved bynewOrderOfpagesof[2, 1]. On the other hand, whenignoreSkippedPagesandnewOrderOfpagesaretrueand[2, 1], respectively, a new PDF file with only 2 pages of the 2nd page and the 1st page is created.
Merge PDF files
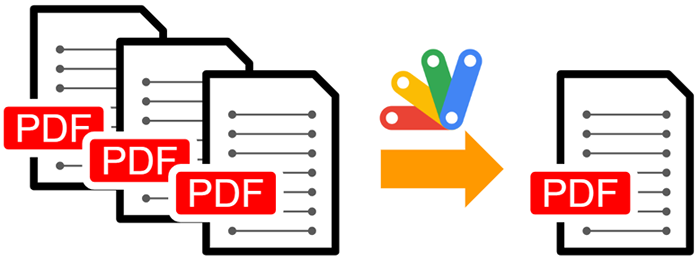
const blob1 = DriveApp.getFileById("###fileId of PDF file 1###").getBlob();
const blob2 = DriveApp.getFileById("###fileId of PDF file 2###").getBlob();
const pdfBlobs = [blob1, blob2];

PDFApp.mergePDFs(pdfBlobs)
  .then((newBlob) => DriveApp.createFile(newBlob))
  .catch((err) => console.log(err));
-
When this script is run, the PDF of
blob1andblob2are merged in order. -
For example, if you want to merge 5 PDF files, please use
const pdfBlobs = [blob1, blob2, blob3, blob4, blob5].
Convert PDF pages to PNG files
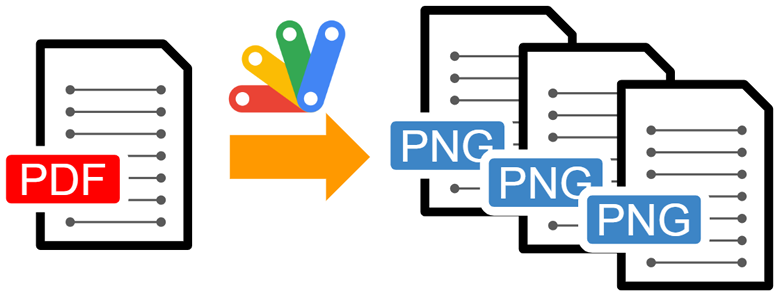
const blob = DriveApp.getFileById("###fileId of PDF file###").getBlob();

PDFApp.setPDFBlob(blob)
  .convertPDFToPng()
  .then((imageBlobs) => imageBlobs.forEach((b) => DriveApp.createFile(b)))
  .catch((err) => console.log(err));
-
When this script is run, all pages of the PDF of
blobare converted to PNG images, and those images are saved as the image files in the root folder. -
When the number of pages is large, it might be better when the PDF is split by “exportPages” method.
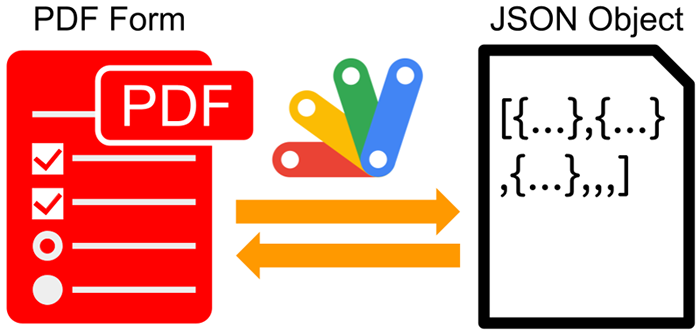
Get values from PDF form
const blob = DriveApp.getFileById("###fileId of PDF file###").getBlob();

PDFApp.setPDFBlob(blob)
  .getValuesFromPDFForm()
  .then((res) => console.log(res))
  .catch((err) => console.log(err));
- When this script is run, the values are retrieved from all fields of PDF form in the inputted PDF blob.
Limitations
In the current stage, the fields of the textbox, the checkbox, the dropdown list, and the radio button of the PDF Form can be used.
Set values to PDF form
const blob = DriveApp.getFileById("###fileId of PDF file###").getBlob();

const object = {
  values: [
    { name: "textbox.sample1.sample1.page1", value: "sample update text" },
    { name: "dropdownlist.sample2.sample1.page1", value: "sample option5" },
    { name: "checkbox.sample3.checkbox1.page1", value: true },
    { name: "checkbox.sample3.checkbox2.page1", value: false },
    { name: "checkbox.sample3.checkbox3.page1", value: true },
    {
      name: "radiobutton.sample4.page1",
      value: "radiobutton.sample4.radiobutton2.page1",
    },
  ],
};

const PDFA = PDFApp.setPDFBlob(blob);
PDFA.setValuesToPDFForm(object)
  .then((newBlob) => DriveApp.createFile(newBlob))
  .catch((err) => console.log(err));
-
When this script is run, the values of
objectare put into each field of PDF form and a new PDF blob is returned. -
About the names of each field of PDF form, they can be retrieved by “getValuesFromPDFForm” method.
-
In this sample, the default font is used. When you want to use the standard font and/or the custom font, it can be seen at the repository of PDFApp.
Limitations
In the current stage, the fields of the textbox, the checkbox, the dropdown list, and the radio button of the PDF Form can be used.
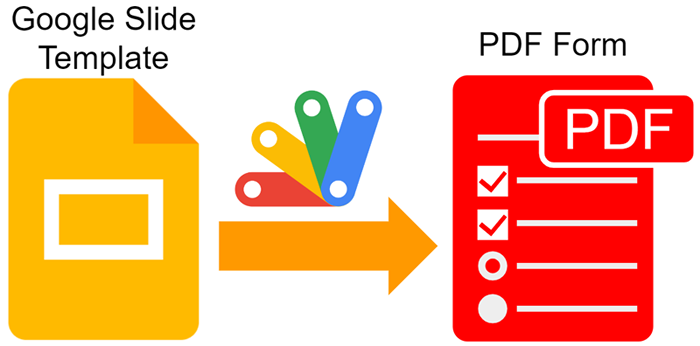
Create PDF form using Google Slide as a template
Preparation
In this case, first, please create a Google Slide as a template as follows.
In the template slide, please set shapes and please set the shape titles. The shape title is required to be the unique value in the slide. Please be careful about this. The following script converts the template shapes to the fields of the PDF form using the shape titles. The flow of this is as follows.
-
Create a new Google Slide.
-
Put texts and shapes on the slide.
-
Texts are used as the text in PDF.
- Shapes are converted to the fields in PDF form.
- Set the ID to the shape title (Alt Text).
- There is a rule regarding the format of ID. Please check the section “Rule of shape title (Alt Text)”.
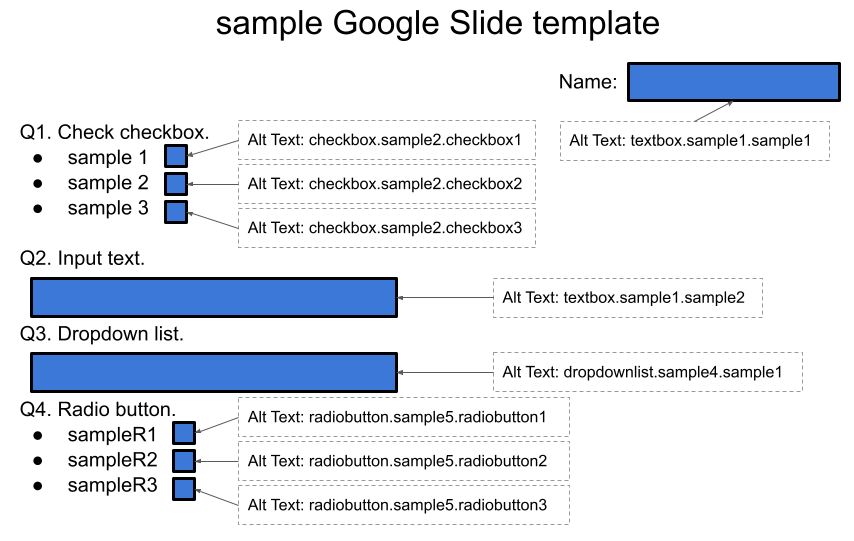
Rule of shape title (Alt Text)
The format of ID (shape title (Alt Text)) is as follows.
{field type}.{group name}.{field name}
When the above sample Google Slide template is used, the IDs of fields of PDF form are as follows.
- Textbox
textbox.sample1.sample1textbox.sample1.sample2
- Checkbox
checkbox.sample2.checkbox1checkbox.sample2.checkbox2checkbox.sample2.checkbox3
- Dropdown
dropdownlist.sample4.sample1
- Radiobutton
radiobutton.sample5.radiobutton1radiobutton.sample5.radiobutton2radiobutton.sample5.radiobutton3
In the case of radiobutton.sample5.radiobutton1, radiobutton is a type of field. sample5 is a group of fields. radiobutton1 is a unique name of the group. radiobutton.sample5 has 3 fields of radiobutton.sample5.radiobutton1, radiobutton.sample5.radiobutton2, and radiobutton.sample5.radiobutton3.
Script
const blob = DriveApp.getFileById("###fileId of PDF file###").getBlob();
const templateId = "###"; // Please set the file ID of your Google Slide template.

const object = {
  values: [
    {
      shapeTitle: "textbox.sample1.sample1",
      methods: [{ method: "setText", value: "sample text1" }],
    },
    {
      shapeTitle: "checkbox.sample2.checkbox1",
      methods: [{ method: "enableRequired" }],
    },
    {
      shapeTitle: "checkbox.sample2.checkbox2",
      methods: [{ method: "enableRequired" }, { method: "check" }],
    },
    {
      shapeTitle: "checkbox.sample2.checkbox3",
      methods: [{ method: "enableRequired" }, { method: "check" }],
    },
    {
      shapeTitle: "textbox.sample1.sample2",
      methods: [
        { method: "setText", value: "sample text2" },
        { method: "enableMultiline" },
        { method: "setFontSize", value: "12" },
      ],
    },
    {
      shapeTitle: "dropdownlist.sample4.sample1",
      methods: [
        {
          method: "setOptions",
          value: [
            "sample option1",
            "sample option2",
            "sample option3",
            "sample option4",
            "sample option5",
          ],
        },
        { method: "enableEditing" },
        { method: "enableMultiselect" },
        { method: "select", value: "sample option3" },
      ],
    },
    {
      shapeTitle: "radiobutton.sample5.radiobutton1",
      methods: [{ method: "enableRequired" }],
    },
    {
      shapeTitle: "radiobutton.sample5.radiobutton2",
      methods: [
        { method: "enableRequired" },
        { method: "select", value: "radiobutton.sample5.radiobutton2" },
      ],
    },
    {
      shapeTitle: "radiobutton.sample5.radiobutton3",
      methods: [{ method: "enableRequired" }],
    },
  ],
};

const templateSlide = DriveApp.getFileById(templateId);
const folder = templateSlide.getParents().next();
const temp = templateSlide.makeCopy("temp", folder);
const tempId = temp.getId();
PDFApp.createPDFFormBySlideTemplate(tempId, object)
  .then((newBlob) => {
    folder.createFile(newBlob);
    temp.setTrashed(true);
  })
  .catch((err) => console.log(err));
-
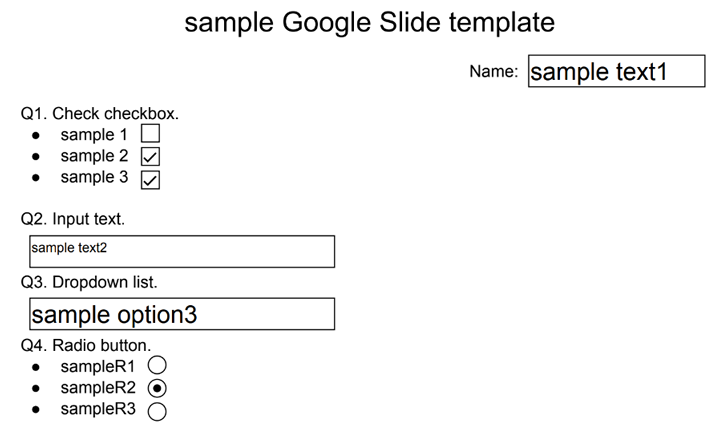
When this script is run, a PDF form is created from Google Slide template.
-
shapeTitle: Shape title (Alt Text). -
methodinmethods: Method names of Class PDFCheckBox, PDFDropdown, PDFRadioGroup, and PDFTextField. -
valueinmethods: Arguments of the methods of Class PDFCheckBox, PDFDropdown, PDFRadioGroup, and PDFTextField. -
The detailed information about the format of
nameand each properties can be seen in this post. -
In this sample, the default font is used. When you want to use the standard font and/or the custom font, it can be seen at the repository of PDFApp.
Limitations
In the current stage, the fields of the textbox, the checkbox, the dropdown list, and the radio button of the PDF Form can be created.
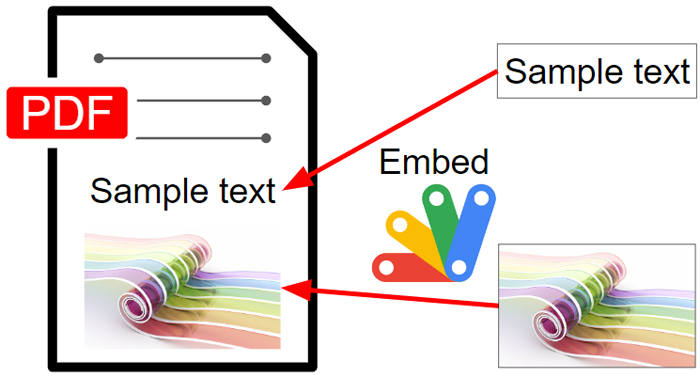
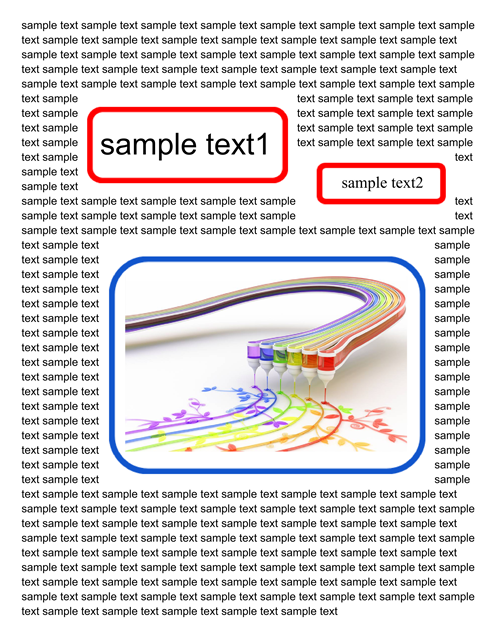
Embed objects into a PDF
const blob = DriveApp.getFileById("###fileId of PDF file###").getBlob();
const object = {
  page1: [
    { text: "sample text1", x: 150, y: 635, size: 30 },
    { text: "sample text2", x: 390, y: 602, size: 16 },
    {
      imageFileId: "### file ID of image file ###",
      x: 175,
      y: 340,
      scale: 0.35,
    },
  ],
};
PDFApp.setPDFBlob(blob)
  .embedObjects(object)
  .then((newBlob) => DriveApp.createFile(newBlob))
  .catch((err) => console.log(err));
-
When this script is run, 2 texts and 1 image are embedded to the 1st page of the PDF file with the default font.
-
From
-
To
-
-
In this case,
objectis constructed as follows. By this, you can set the objects for each page.
const object = {
  page1: [
    { text: "sample text1", x: 150, y: 635, size: 30 },
    { text: "sample text2", x: 390, y: 602, size: 16 },
    { imageFileId: "### file ID of image file ###", x: 175, y: 340, scale: 0.35 },
  ],
  page2: [,,,],
  page3: [,,,],
  ,
  ,
  ,
};
Limitations
In the current stage, the objects of texts and images can be embedded in a PDF.
Summary
This library (PDFApp) is used as a wrapper for connecting Google Apps Script and pdf-lib. When this library is used, PDF data can be managed more efficiently with a simple script with cloud computing and can help to achieve the automation process.
References
-
GitHub repository of PDFApp is here.
-
Exporting Specific Pages From a PDF as a New PDF Using Google Apps Script
-
Changing Order of Pages in PDF file using Google Apps Script
-
Merging Multiple PDF Files as a Single PDF File using Google Apps Script
-
Converting All Pages in PDF File to PNG Images using Google Apps Script
-
Retrieving and Putting Values for PDF Forms using Google Apps Script
-
Creating PDF Forms from Google Slide Template using Google Apps Script