Abstract
The Gemini API enables both content generation and semantic search, managing data effectively. This report introduces a Gemini-powered similarity viewer for easy visualization of complex text similarity scores, using Google Spreadsheet and Apps Script.
Introduction
The Gemini API unlocks new possibilities, extending its capabilities beyond content generation to encompass semantic search. Within this context, the API excels at efficiently managing data within corpora. While semantic search provides valuable similarity scores (chunkRelevanceScore) for text pairs, interpreting these numerical values can be cumbersome. This report addresses this challenge by introducing a novel similarity viewer, built upon the powerful trio of Gemini API, Google Spreadsheet, and Google Apps Script. This user-friendly tool allows us to visually represent the similarity of texts, transforming numerical data into an intuitive and easily digestible format.
Usage
1. Create a GAS project.
Please create a new Google Spreadsheet and open the script editor.
2. Linking Google Cloud Platform Project to Google Apps Script Project for New IDE
In this case, you can see how to do this at my repository.
Also, please enable Generative Language API at the API console.
After the above setting, the following sample script can be used.
3. Install library
In this script, in order to manage Corpora, a Google Apps Script library of CorporaApp is used. Please install the library. You can see how to install it at my repository.
Library’s project key is 1XrAybct1KUwGcFrEZ9BOd5sa0SoHeQwGhOWkDOHki9lDFAX9OHlO03y_.
When you install this library, the following required scopes are automatically installed.
https://www.googleapis.com/auth/script.external_requesthttps://www.googleapis.com/auth/generative-language.retriever
4. Prepare a sample data
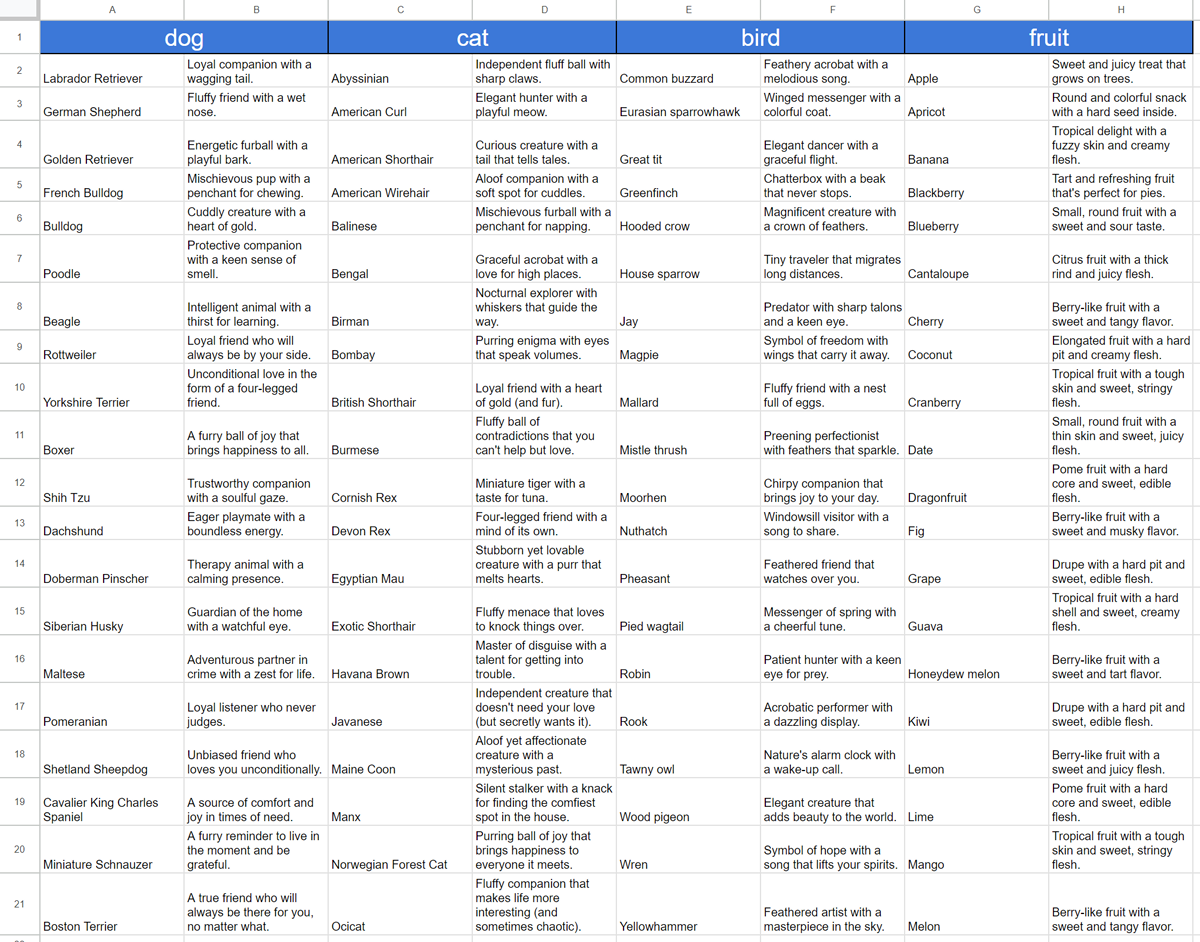
In order to test this script, I prepared sample data in a spreadsheet using Gemini.
The sample data includes columns for:
- I asked
Return 20 kinds of dogs as text words., and I put the returned values in column “A”. - I asked
Return 20 kinds of explanations about dogs without using a word of dog within 50 words of text, respectively., and I put the returned values to column “B”.
Similar sample data was created for “cats,” “birds,” and “fruits” following the same process. The following image is the created sample.
5. Script
In this script, there are 2 parts of Google Apps Script and HTML. So, please copy and paste them respectively.
Google Apps Script: Code.gs
Please copy and paste the following script to Code.gs on the script editor.
In this script, a corpus of corpora/sample-serviceaccount-1 and a document of corpora/sample-serviceaccount-1/documents/sample-serviceaccount-1 in the corpus are created. The chunks are stored in the document.
/**
 * ### Description
 * Create a custom menu by the simple trigger of OnOpen.
 *
 * @return {void}
 */
function onOpen() {
  SpreadsheetApp.getUi()
    .createMenu("Similarity Viewer")
    .addItem("run", "openSidebar")
    .addToUi();
}

/**
 * ### Description
 * Open sidebar on Google Spreadsheet.
 *
 * @return {void}
 */
function openSidebar() {
  const html =
    HtmlService.createHtmlOutputFromFile("index").setTitle("Similarity Viewer");
  return SpreadsheetApp.getUi().showSidebar(html);
}

/**
 * ### Description
 * The values of accessToken, newCorpusName, newDocumentName are returned.
 *
 * @return {Object} Object including accessToken, newCorpusName, newDocumentName.
 */
function init_() {
  const accessToken = ScriptApp.getOAuthToken();
  const newCorpusName = {
    name: "corpora/sample-serviceaccount-1",
    displayName: "sample corpus serviceaccount 1",
  };
  const newDocumentName = {
    name: `${newCorpusName.name}/documents/sample-serviceaccount-1`,
    displayName: "sample document serviceaccount 1",
  };
  return { accessToken, newCorpusName, newDocumentName };
}

/**
 * ### Description
 * Cell values of the active sheet are stored to a document in Corpus with Gemini API.
 *
 * @param {Number} headerRows Number of the header rows in the active sheet.
 * @return {void}
 */
function synchronize(headerRows = 1) {
  const { accessToken, newCorpusName, newDocumentName } = init_();
  const ca = CorporaApp.setAccessToken(accessToken);
  const res2 = ca.getDocuments(newCorpusName.name);
  if (res2.find(({ name }) => name == newDocumentName.name)) {
    ca.deleteDocument(newDocumentName.name, true);
  }
  ca.createDocument(newCorpusName.name, newDocumentName);
  const sheet = SpreadsheetApp.getActiveSheet();
  const values = sheet
    .getRange(
      headerRows + 1,
      1,
      sheet.getLastRow() - headerRows,
      sheet.getLastColumn()
    )
    .getDisplayValues();
  const requests = values.flatMap((r, i) =>
    r.map((c, j) => {
      return {
        parent: newDocumentName.name,
        chunk: {
          data: { stringValue: c },
          customMetadata: [
            {
              key: "range",
              stringValue: JSON.stringify({ row: i + 1, col: j + 1 }),
            },
          ],
        },
      };
    })
  );
  ca.setChunks(newDocumentName.name, { requests });
}

/**
 * ### Description
 * Search texts by a text using Gemini API. And, the results are shown as the background colors of cells and notes on the cells.
 *
 * @param {Object} o Object including headerRows, searchText, threshold from HTML side.
 * @return {void}
 */
function search(o) {
  const { headerRows, searchText, threshold } = o;
  const { accessToken, newDocumentName } = init_();

  const ca = CorporaApp.setAccessToken(accessToken);
  const res = ca.searchQueryFromDocument(newDocumentName.name, {
    query: searchText,
    resultsCount: 100,
  });
  const obj = JSON.parse(res.getContentText());
  const rows = obj.relevantChunks.map(
    ({
      chunk: {
        data: { stringValue },
        customMetadata,
      },
      chunkRelevanceScore,
    }) => ({
      stringValue,
      chunkRelevanceScore,
      range: JSON.parse(customMetadata[0].stringValue),
    })
  );
  const rowData = rows.map(({ range }) => range.row).sort((a, b) => a - b);
  const minRow = rowData[0];
  const maxRow = rowData.pop();
  const colData = rows.map(({ range }) => range.col).sort((a, b) => a - b);
  const minCol = colData[0];
  const maxCol = colData.pop();
  const backgrounds = [...Array(maxRow - minRow + 1)].map((_) => [
    ...Array(maxCol - minCol + 1).fill(null),
  ]);
  const notes = [...Array(maxRow - minRow + 1)].map((_) => [
    ...Array(maxCol - minCol + 1).fill(null),
  ]);
  const chunkRelevanceScores = rows
    .map(({ chunkRelevanceScore }) => chunkRelevanceScore)
    .sort((a, b) => a - b);
  const minChunkRelevanceScore = chunkRelevanceScores[0];
  const maxChunkRelevanceScore = chunkRelevanceScores.pop();
  const step = (maxChunkRelevanceScore - minChunkRelevanceScore) / 255;
  const res2 = rows.map((e) => {
    const rgbToHex = (r, g, b) =>
      "#" + ((1 << 24) | (r << 16) | (g << 8) | b).toString(16).slice(1); // ref: https://stackoverflow.com/a/5624139
    const g = Math.round(
      (e.chunkRelevanceScore - minChunkRelevanceScore) / step
    );
    return { ...e, rgb: rgbToHex(255 - g, 255, 255 - g) };
  });
  res2.forEach(({ range: { row, col }, rgb, chunkRelevanceScore }) => {
    notes[row - 1][col - 1] = chunkRelevanceScore;
    if (chunkRelevanceScore < threshold) return;
    backgrounds[row - 1][col - 1] = rgb;
  });
  const sheet = SpreadsheetApp.getActiveSheet();
  sheet
    .getRange(
      headerRows + 1,
      1,
      sheet.getLastRow() - headerRows,
      sheet.getLastColumn()
    )
    .setBackground(null)
    .setNote(null);
  sheet
    .getRange(headerRows + 1, 1, backgrounds.length, backgrounds[0].length)
    .setBackgrounds(backgrounds)
    .setNotes(notes);
}

/**
 * ### Description
 * Reset background colors and notes of the cells.
 *
 * @param {Number} headerRows Number of the header rows in the active sheet.
 * @return {void}
 */
function reset(headerRows) {
  const sheet = SpreadsheetApp.getActiveSheet();
  sheet
    .getRange(
      headerRows + 1,
      1,
      sheet.getLastRow() - headerRows,
      sheet.getLastColumn()
    )
    .setBackground(null)
    .setNote(null);
}
HTML: index.html
Please copy and paste the following HTML to index.html on the script editor. In this sample,
materialize is used for creating the interface on the sidebar.
<!DOCTYPE html>
<html>
  <head>
    <base target="_top" />
    <link
      rel="stylesheet"
      href="https://cdnjs.cloudflare.com/ajax/libs/materialize/1.0.0/css/materialize.min.css"
    />
    <script src="https://cdnjs.cloudflare.com/ajax/libs/materialize/1.0.0/js/materialize.min.js"></script>
    <link
      href="https://fonts.googleapis.com/icon?family=Material+Icons"
      rel="stylesheet"
    />
    <style>
      body {
        letter-spacing: 0.15rem;
      }

      .container {
        margin-bottom: 10px;
      }
    </style>
  </head>

  <body>
    <header>
      <h5 class="header center light-blue-text text-darken-4">
        Similarity Viewer
      </h5>
    </header>
    <div class="container">
      <div class="input-field col s6">
        <input
          type="number"
          name="headerRows"
          id="headerRows"
          class="validate"
        />
        <label for="headerRows">Set header rows.</label>
      </div>
      <div class="input-field col s6">
        <input
          type="text"
          name="search"
          id="search"
          class="validate"
          step="any"
          required
        />
        <label for="search">Set search text.</label>
      </div>
      <div class="input-field col s6">
        <input
          type="number"
          name="threshold"
          id="threshold"
          class="validate"
          step="any"
          required
        />
        <label for="threshold">Set threshold.</label>
      </div>
      <a class="waves-effect waves-light btn-small" onclick="run(this)">run</a>
      <a class="waves-effect waves-light btn-small" onclick="reset(this)"
        >reset</a
      >
    </div>
    <div class="container">
      <a class="waves-effect waves-light btn-small" onclick="synchronize(this)"
        ><i class="material-icons left">cloud</i>Synchronize corpus</a
      >
    </div>

    <script>
      function synchronize(e) {
        e.textContent = "PROCESSING...";
        e.style.pointerEvents = "none";
        const headerRows = Number(
          document.getElementById("headerRows").value || 0
        );
        google.script.run
          .withSuccessHandler((_) => {
            e.innerHTML =
              '<i class="material-icons left">cloud</i>Synchronize corpus';
            e.style.pointerEvents = "auto";
          })
          .synchronize(headerRows);
      }

      function run(e) {
        e.textContent = "PROCESSING...";
        e.style.pointerEvents = "none";
        const headerRows = Number(document.getElementById("headerRows").value);
        const searchText = document.getElementById("search").value;
        const threshold = Number(document.getElementById("threshold").value);
        if (searchText == "") {
          e.textContent = "run";
          e.style.pointerEvents = "auto";
          return;
        }
        google.script.run
          .withSuccessHandler((_) => {
            e.textContent = "run";
            e.style.pointerEvents = "auto";
          })
          .search({ headerRows, searchText, threshold });
      }

      function reset(e) {
        e.textContent = "PROCESSING...";
        e.style.pointerEvents = "none";
        const headerRows = Number(document.getElementById("headerRows").value);
        google.script.run
          .withSuccessHandler((_) => {
            e.textContent = "reset";
            e.style.pointerEvents = "auto";
          })
          .reset(headerRows);
      }
    </script>
  </body>
</html>
6. Testing
You can see the demonstration in the top image in this report. Please do the following steps.
- When you open the Google Spreadsheet, a custom menu is created. Selecting “Run” from the “Similarity Viewer” opens a sidebar.
- If the first row of your active sheet is a header row, set “Set header rows” to 1.
- To store the cell values in the corpus, click the “SYNCHRONIZE CORPUS” button. This stores the values from the active sheet in the created corpus.
- Enter your search text in the “Set search text” field.
- Set the threshold (e.g., 0.5) in the “Set threshold” field. This value corresponds to the chunkRelevanceScore.
- Click the “RUN” button. This sets background colors and notes on the active sheet based on the chunkRelevanceScore.
- You can adjust the threshold (chunkRelevanceScore) by checking the background colors and notes on the cells.
The intensity of the color indicates the value of chunkRelevanceScore: darker green signifies a higher score, and lighter green signifies a lower score. You can close to the expected result by adjusting the search text and the threshold. These search text and the threshold can be also used to Method: models.generateAnswer.
Note
The current maximum number of chunks is 1,000,000. However, due to the current maximum of 100 returned chunks for both the corpora.query and corpora.documents.query methods, adjusting the threshold easily is crucial for achieving the desired results.
The current version of the Gemini API for managing Corpora is “v1beta.” While the above information is from the reference Ref, updates may occur in the future.