This is a sample script for creating the user’s dashboard by inputting the user name and password using Web Apps with Google Apps Script. In this case, Google Spreadsheet is used as a database of the dashboard.
Usage
1. Create a Google Apps Script project.
In order to use Web Apps, please create a new Google Apps Script project. In this case, please create a new Spreadsheet and open the script editor of Spreadsheet.
And, please set the sheet name of the sheet in the created Spreadsheet to “Sheet1”. This sheet is used. The sample sheet is as follows.

2. Sample script.
Please copy and paste the following script to the script editor of the created Google Apps Script project.
Google Apps Script side: Code.gs
About url, please set your Web Apps URL after the Web Apps was deployed. Because the URL can be known when the Web Apps is deployed.
const url = "https://script.google.com/macros/s/###/exec"; // Please set Web Apps URL.

// Please set user's name and passwork and the sheetname of the user.
// To use the sheet name is a sample situation for explaining this method.
const obj = [
  { name: "sampleName1", password: "samplePassword1", sheetName: "Sheet1" },
  { name: "sampleName2", password: "samplePassword2", sheetName: "Sheet2" },
  { name: "sampleName3", password: "samplePassword3", sheetName: "Sheet3" },
  ,
  ,
  ,
];

function doGet(e) {
  const { name, pass } = e.parameter;
  let error = false;
  if (name && pass) {
    const find = obj.find((f) => f.name == name && f.password == pass);
    if (find) {
      const html = HtmlService.createTemplateFromFile("showData");

      // This is a sample value. Please modify this for your actual situation.
      const sheet = SpreadsheetApp.getActiveSpreadsheet().getSheetByName(
        find.sheetName
      );
      const values = JSON.stringify(sheet.getDataRange().getValues());
      html.data = values;

      return html
        .evaluate()
        .setXFrameOptionsMode(HtmlService.XFrameOptionsMode.ALLOWALL);
    }
    error = true;
  }
  const html = HtmlService.createTemplateFromFile("login");
  html.url = url;
  html.error = error ? "Login error" : "";
  return html
    .evaluate()
    .setXFrameOptionsMode(HtmlService.XFrameOptionsMode.ALLOWALL);
}
HTML & Javascript side: login.html
<p><?!= error ?></p>
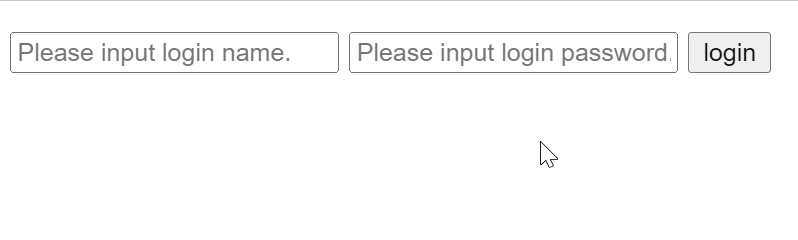
<input type="text" id="name" placeholder="Please input login name." />
<input type="password" id="pass" placeholder="Please input login password." />
<input type="button" value="login" onclick="sample()" />
<script>
function sample() {
const url = "<?!= url ?>";
const [name, pass] = ["name", "pass"].map(
(e) => document.getElementById(e).value
);
window.open(`${url}?name=${name}&pass=${pass}`, "_top");
}
</script>
HTML & Javascript side: showData.html
<?!= data ?>
3. Deploy Web Apps.
The detailed information can be seen at the official document.
Please set this using the new IDE of the script editor.
- On the script editor, at the top right of the script editor, please click “click Deploy” -> “New deployment”.
- Please click “Select type” -> “Web App”.
- Please input the information about the Web App in the fields under “Deployment configuration”.
- Please select “Me” for “Execute as”.
- This is the importance of this workaround.
- Please select “Anyone” for “Who has access”.
- Please click “Deploy” button.
- Copy the URL of the Web App. It’s like
https://script.google.com/macros/s/###/exec. - Please set your Web Apps URL to the value of
urlin the above sample script. And, please reflect the latest script in the Web Apps. By this, your script can be used. Please be careful about this.- When you modified the Google Apps Script, please modify the deployment as a new version. By this, the modified script is reflected in Web Apps. Please be careful about this.
- You can see the detail of this in the report “Redeploying Web Apps without Changing URL of Web Apps for new IDE”.
5. Testing
When you access your Web Apps URL like https://script.google.com/macros/s/###/exec using your browser, you can see the log in. When the above script is used, when you input sampleName1 and samplePassword1 are put to the name and password, respectively, you can see the content of Sheet1. This value is for the specific name and password. The sample demonstration is as follows.
In this sample, by creating the URL including the query parameter, the user’s dashboard can be created using Google Spreadsheet.
Note
-
This is a simple sample script and situation. So, please modify this for your actual situation.
-
When you modified the Google Apps Script, please modify the deployment as a new version. By this, the modified script is reflected in Web Apps. Please be careful about this.
-
You can see the detail of this in the report “Redeploying Web Apps without Changing URL of Web Apps for new IDE”.
References
- Web Apps
- Taking advantage of Web Apps with Google Apps Script
- This sample script has been answered to this thread of Stackoverflow.